
Whether you’re struggling with pain in your wrists, elbows, or shoulders in your front rack position, or you’re here to find key performance opportunities, I got your back.
It’s funny; any time you see the word “perfect” in the fitness industry, you should always approach it with some skepticism…
In the world of movement mechanics and mobility training, there is no such thing as perfect.
So, seems silly that I'd use the word "perfect" throughout so many of the titles within this article, doesn't it?
Think of it this way, whenever I'm using this word, what I really mean is "most ideal" - because that's the closest to perfect that we can get.
Now, there are countless nuances that can influence the way your front rack position feels and how you perform within it.
What is more appropriate for one goal (example: front squat), is not necessarily the most optimal state for another (example: jerk or push press).
My goal for today is to discuss the extreme of the front rack position.
To show you what is required to achieve the front rack with a full grip on the barbell, high elbows, and an upright posture so that you have all the various movement options available to you and can feel confident and powerful within the most appropriate position for the goal.
In some cases, that is just fingertips on the bar, just keeping it balanced.
And in other cases that is a crushing full grip that allows you to generate power to transition into the overhead position.
In this article, we are going to dive into the 3 most important areas to focus your mobility training on, some common symptoms that you may be struggling with as a result of weakness within those areas, and I’ll also give you 3 different mobility exercises to play around with in the effort to improve your front rack position.
The Mechanics of the Perfect Front Rack Position

The front rack position is often a catalyst to the overhead position.
You see it in the clean & jerk.
Push press.
Thrusters.
In order to achieve performance improvement (and symptom reduction, like reducing elbow pain), we have to direct our attention to the big rocks of a proper front rack position.
The 3 Big Rocks
Remember when you were a kid, and you’d put sand, dirt (or little rocks), and big rocks into a bucket? Well, if you shake that bucket around, you’ll notice that the sand and dirt fall to the bottom while the big rocks remain at the top.
This analogy is a representation of bang-for-your-buck efforts.
While the bucket itself can be considered the goal, the sand is considered to be the small, unimportant thing.
The dirt (or small rocks) are things that call upon your attention but may not offer big-picture progress.
And the big rocks are the things that give you the biggest bang. They are what should remain the main focus.
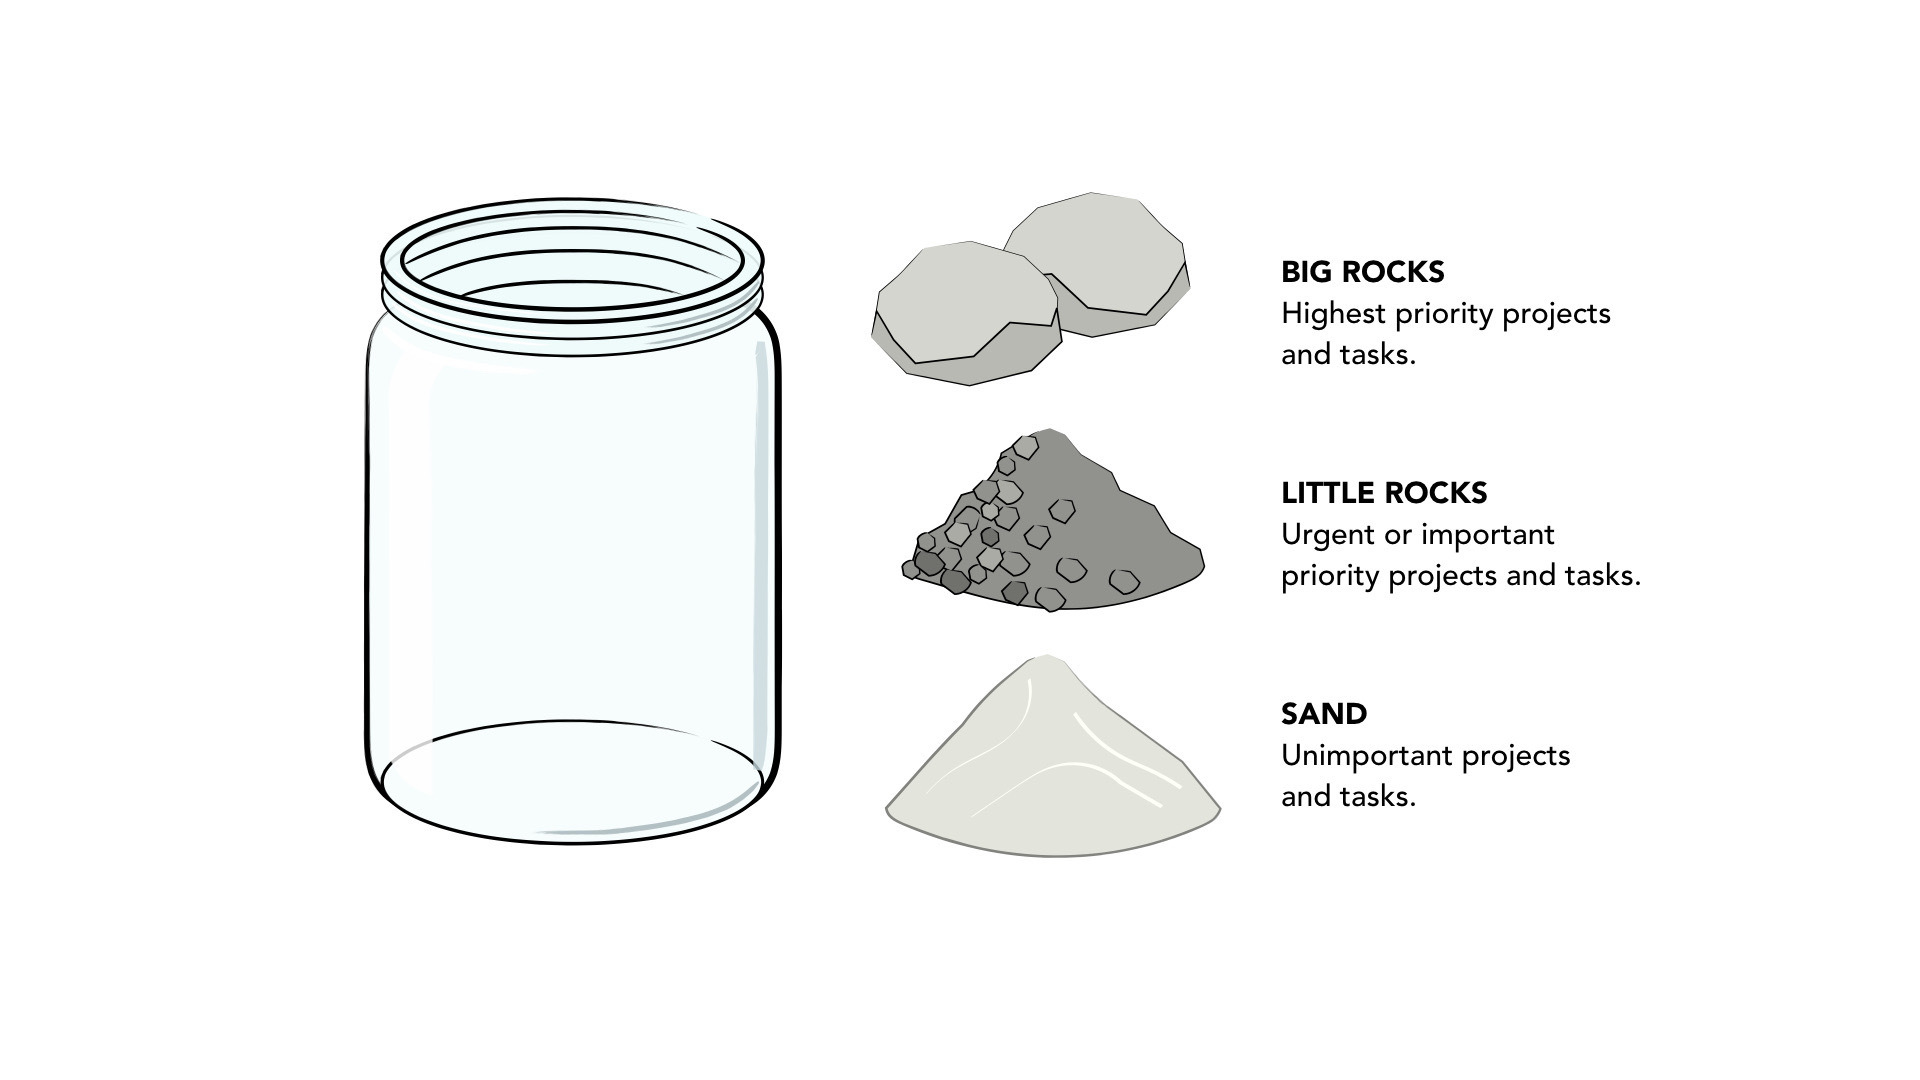
From a mobility perspective, let’s look at the 3 big rocks inside the bucket of front rack performance.
Thoracic extension, scapular protraction and upward rotation, and shoulder external rotation.
If the size of the rock were to determine the level of influence, each would have on how someone feels and ultimately performs in their front rack position, this is how they would be organized from largest to smallest (of the big rocks):
- Shoulder External Rotation
- Thoracic Extension
- Scapular Protraction & Upward Rotation
Here are some quick videos to demonstrate the different mechanics referred to above:
Shoulder External Rotation
Thoracic Extension
Scapular Upward Rotation
Scapular Protraction
Common Symptoms of a Poor Front Rack Position

A poor front rack position can cause multiple issues across the board.
Discomfort, poor form and technique, even stalled progress over time.
Some of the most common symptoms that we see at Primal Mobility are:
- Wrist pain/discomfort
- Elbow pain/discomfort
- Forearm tightness
Without fail, when we have these conversations the individual will mention that they are addressing this discomfort regularly by focusing on the sand and little rocks (stretching their wrists, rolling out their forearms and triceps, etc.).
As you know now, the real progress will come from the big rocks that were discussed above.
So…let’s play around with some Primal Mobility exercises to start making some improvement in the front rack position (listed in order of the big rocks)!
As always, remember that intention is incredibly important.
Pay attention to the cues and fine details of the exercises to make sure you get the most out of your efforts.
Exercise 1: Front Rack External Rotations
This exercise will be directly addressing the range of motion within this function of the shoulder, while also incorporating some isometric contractions.
Cues:
- Grab a PVC pipe or broom stick and gently pull your shoulder into external rotation until you experience a safe, yet deep stretch
- Make sure the elbow is pointed directly out in front of you to help mimic the front rack position
- Once you’ve found the stretch, hold that for 30-60 seconds to help relax the muscles around the shoulder
- After the 30-60 seconds, without any change in position, press your wrist into the stick, engaging the muscles in the shoulder to pull your shoulder into internal rotation
- Hold this press for 5-10 seconds with about 70-80% of your safest maximal effort.
- After the 5-10 second press, pull your shoulder into a slightly deeper stretch and hold for 10-20 seconds before repeating
Exercise 2: Kneeling Scap CARs
This exercise will help you learn how to move and control your scapula through some of the deepest ranges of motion it will be challenged through during a front rack position.
*The benefits of this exercise really stem from the intensity you apply to it, so make sure you really engage your entire body and fight hard to control every corner of the movement.
Cues:
- Start by getting onto your hands and knees (place a mat under your knees if needed)
- Next, begin by locking out your elbows (squeeze your triceps) and kicking your feet into the ground.
- This will increase the intensity of the exercise and engage your core, helping you bring more stability and control to the scapulas
- Once your body is engaged, start to move your scapula through its full range of motion with as little compensations from other areas
- Avoid craning your neck, shrugging excessively, bending your elbows, or moving your low back
- If this movement is too challenging to achieve, try moving your scapula in a box shape rather than a circle - finding each corner of range of motion as you go
This exercise is highly challenging. It will take you some time to get the movement down, but once it clicks it’s magical for the shoulders!
Exercise 3: Thoracic Extensions On Foam Roller
This one is our version of a highly popular thoracic stretch.
The way we approach it is to implement isometric contractions at the deepest position of the stretch to help challenge the muscles within these ranges and increase the duration of the results.
One of the most common things we have to address when we program this exercise is that most people will miss that crucial last step to each rep…
So, when watching the video, pay attention to the cues at the end that suggest the muscular contractions (the benefits and improvements will be much more pronounced if you do)!
Cues:
- Grab a foam roller (or yoga block, arm of the couch, anything that will prop you comfortably into thoracic extension) and place it directly below the shoulder blades
- Lace your fingers behind your head and relax your neck into your hands and
- Take a deep breath in, on SLOW exhale gently fold over the foam roller letting your thoracic spine find a deep stretch in extension
- Once you’ve found the deep stretch and have finished your slow exhale, engage your muscles in the upper back (imagine pulling your scapula down into your back pocket if the contraction is challenging)
- Hold for 1 second
- Move back to the top of the exercise, take another deep breath in, and perform your next rep
How Primal Mobility Can Help You Nail the Perfect Front Rack Position
Spinning your wheels in your mobility training is one of the most frustrating things that a barbell athlete will go through.
I get it…you’re not afraid to put in the work, but you definitely aren’t interested in wasting your time and energy on something that won’t offer you results.
At Primal Mobility, our main purpose is to revolutionize the mobility industry by debunking common myths and providing expert support.
Our sole mission is to bring the most practical, results-driven resources to athletes and coaches of all levels to be able to learn, digest, implement, and reap the rewards.
If you’re looking to get some help with your pain, performance, or injury challenges..schedule a call with our head coach at this link: https://www.primalmobility.com/get-a-coach
We’ll chat with you to learn more about your situation and see if Primal Mobility is the right fit for you!
If you’re a coach and want to learn how you can take your knowledge of strength-based mobility training and movement mechanics to a whole new level, check out our website to learn more about our courses: https://www.primalmobility.com/Primalmobility-Certification

